
You've got a peeling weatherboard on the North Shore, or maybe a cedar beam that's blistered again after the last repaint, and the first instinct is usually the same, find a stronger stripper and get it off fast. That's the wrong starting point on most jobs I see. The better question is whether the coating should come off at all, what's under it, and whether the next finish will hold up in coastal air.
Paint remover NZ decisions sit inside a much bigger repainting cycle. New Zealand's painting and decorating services industry was estimated at $2.0 billion in 2026 with 5,832 businesses operating in 2025, and IBISWorld reports a 2.3% CAGR in business count from 2020 to 2025 and 1.7% CAGR in market size over the same period, which tells you stripping isn't a one-off niche task, it's part of recurring preparation work across homes and commercial properties (IBISWorld). When a repaint is already part of the plan, stripping becomes a decision about durability, safety, and substrate protection, not a shopping trip.
Why North Shore Homeowners Are Rethinking Paint Removal
A Birkenhead weatherboard with peeling patches along the south side tells a familiar story. The owner usually wants the failure gone, but the issue is often hiding in the layers below, trapped moisture, poor adhesion, or a previous repaint that never had enough prep behind it. Stripping everything back can solve one problem and create another if the timber is already fragile, the house has lead-paint risk, or the new coating system was never right for the substrate.
Decisions about paint remover NZ sit inside a much bigger repainting cycle. On the North Shore, that means weighing speed against substrate damage, and often deciding whether the coating should come off at all. A full strip sounds decisive, but on weatherboards, cedar, plaster, and metal, it can expose weaknesses that a lighter prep would have left intact. That trade-off is why the best answer is usually specific to the job, not the product shelf.
The market behind the problem
The scale of the broader repaint market matters because it shows how often paint removal is tied to maintenance rather than renovation vanity. A New Zealand government product-stewardship study found the decorative paint market consumed about 25 million litres per year and was worth roughly $250 million wholesale, with estimated shares of 36% Resene, 36% Dulux, 23% Wattyl, and 5% other brands (Product stewardship paint study). That concentration helps explain why surface prep, brand compatibility, and repaint cycles are so connected in NZ work.
On coastal homes, the decision is rarely whether to strip in the abstract. It is more often whether to strip the failing patch, feather the edges, seal the substrate properly, and leave the sound areas alone. That approach is common on North Shore villas and bungalows, where one side of the house can be battered by weather while the sheltered side still looks serviceable.
Practical rule: if the coating failure looks localised, start by asking what caused the failure, not which remover is strongest.
That is why this topic deserves a practitioner's view. The call is not buying a can of remover, it is deciding whether removal will extend the life of the next coat or just expose a bigger repair job.
What Paint Remover Actually Does and the Four Main Methods
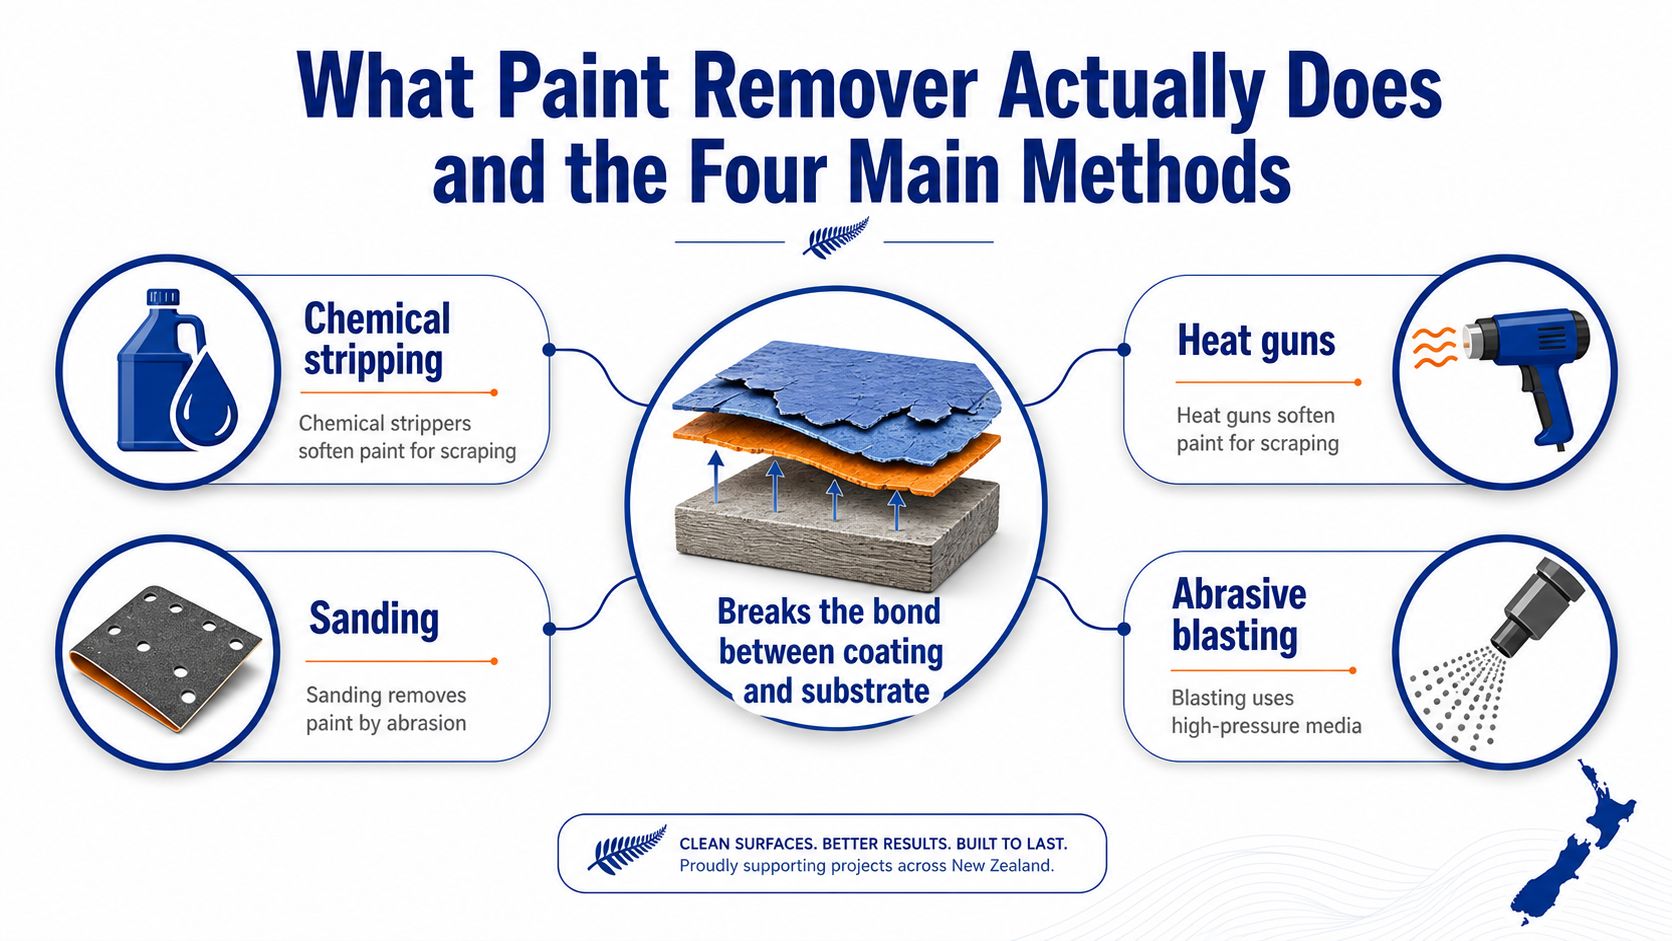
Paint remover is anything that breaks the bond between a coating and its substrate. That bond can be weakened chemically, softened with heat, abraded away, or sheared off mechanically. The right method depends on the coating system, the surface underneath, and how much damage you're prepared to risk during removal.
Chemical, heat, sanding, and mechanical removal
Chemical strippers work by softening or lifting the binder in the coating so it can be scraped off. Water-based gels are common for detailed or vertical work because they cling instead of running, which is why they're often used where a careful brush-on application makes sense. For broader context on surface cleaning compared with aggressive rinsing, a general pressure washing for driveways guide shows the same principle, match the force to the material, don't assume more pressure equals better results.
Heat guns and infrared tools blister the paint film so it can be scraped once it loosens. They suit small joinery details, single layers, and controlled interior work, but they become a bad idea fast when there's lead risk, nearby glazing, or a substrate that can scorch.
Sanding removes paint by abrasion. It's the default for many exterior timber prep jobs because it feathers edges and opens the surface for new primer, but it also creates dust and can cut too deep on soft timber or old plaster.
Mechanical methods use scrapers, planers, or abrasive blasting to shear material off. They're efficient on some fences, decks, and metal work, but they can gouge cedar, distort soft details, or leave a substrate rougher than the next coating system can properly cover.
The useful way to think about all four is simple. Each one trades speed, cleanliness, and control differently, and none of them is universally “best”.
Matching the Method to the Substrate on NZ Homes
North Shore houses aren't made of one material, and that's why a single stripping rule never works for long. Weatherboards, cedar, plaster, brick, and metal all punish the wrong method in different ways. The safest choice is the one that removes only as much coating as the substrate can tolerate before priming.
Timber, cedar, plaster, brick, and metal
For timber weatherboards, sanding is usually the most realistic choice for wide-area prep because it feathers lifted edges and gives the new coat something to grip. The risk is over-sanding soft grain or leaving dust behind, which can undermine adhesion if the surface isn't washed and primed properly.
For cedar beams and fences, chemical gel removers can be a better fit when the profile is detailed or the surface has layered old paint. Cedar is easy to damage with aggressive scraping, and mechanical methods can leave it shredded or uneven. Heat can work on small areas, but it's not my first choice where the timber is dry, weathered, or already fragile.
For plaster and stucco, the problem is often less about speed and more about surface integrity. Too much abrasion can wreck the finish coat or open hairline cracks that need repair before any repaint can succeed. Chemical methods are sometimes used for stubborn patches, but the main goal is usually selective removal, not a full strip.
For brick and concrete, compatibility matters more than brute force. A gel remover can lift old paint from awkward areas without the dust cloud you'd get from heavy grinding. On rough masonry, full removal can be time-consuming, so the better result often comes from removing only the failed coating and rebuilding the system with the right primer.
For metal flashings or railings, the challenge is adhesion and corrosion control. Mechanical methods can be useful if the coating is already breaking away, but the exposed metal needs to be treated quickly and sealed. A controlled stripper is often preferable where detail matters and run-off would be a problem.
Don't choose the method first. Choose the substrate, the coating history, and the amount of bare material the next system actually needs.
| Substrate | Best-fit method | Main risk to avoid |
|---|---|---|
| Weatherboard | Sanding | Over-sanding and dust contamination |
| Cedar | Chemical gel stripping | Gouging soft timber |
| Plaster or stucco | Targeted stripping or sanding | Breaking the surface skin |
| Brick or concrete | Chemical stripping | Leaving residue in texture |
| Metal | Mechanical or chemical stripping | Flash corrosion after exposure |
The old habit is to strip everything until it looks “clean”. On North Shore homes, that often causes more harm than a measured prep job would have done. If you're choosing a new finish after removal, it helps to think about the coating system as a whole, not just the paint that's coming off. For that, paint for house choices matter as much as the removal method.
How Coastal Conditions Change the Stripping Equation
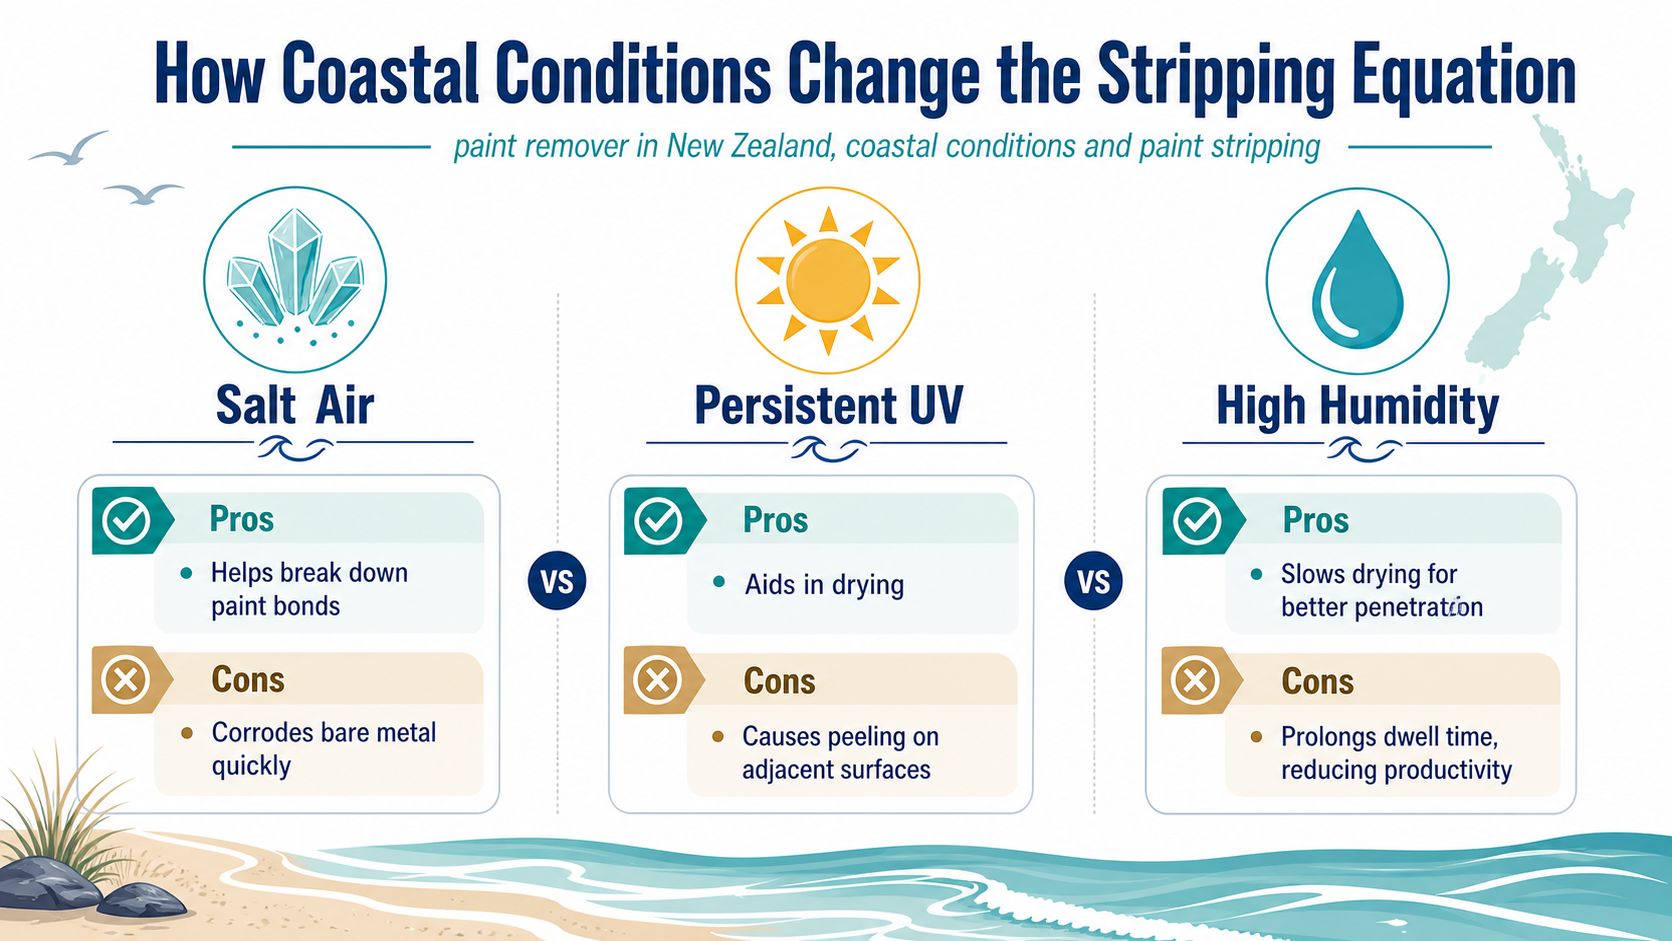
Auckland's coastal climate changes the job before a single scraper touches the wall. Salt air, high humidity, and persistent UV all affect how long a remover needs to dwell, how well a surface dries after stripping, and how quickly a new primer can be applied without trapping moisture. On the North Shore, the weather on the week you strip often matters as much as the product itself.
Timing matters more near the coast
Water-based gel removers are often preferred on exterior restoration work because they're easier to control on vertical surfaces and they don't throw dust into the air. Dulux Precision Restoration Coatings Remover is designed to trap aged coatings in a wet state and is specified for brick, metal, stone, plaster, fibreglass, cast iron, and marble. Its datasheet sets a working window of 10–30°C surface temperature and about 50% relative humidity, with performance dropping substantially outside those conditions, and it recommends a wet-film build of 2000–6000 microns and dwell times from 1–72 hours depending on the coating (Dulux datasheet).
That matters in a place like the North Shore because damp air can stretch the timetable, but it also gives you more control than dry sanding on a blustery day. Heat and sanding can be faster in ideal conditions, yet both become harder to manage when moisture is high, dust control matters, or bare substrate needs to be protected while you wait for the next coat.
Bare substrate is the real exposure risk
A stripped wall isn't finished work, it's vulnerable work. Salt air can start working on exposed metal quickly, and bare timber takes on weather stress faster than a coated surface does. If you strip too close to winter, you can end up spending longer drying, filling, and waiting for prime windows that aren't suitable.
That's why the “slow” method isn't always the slowest one in practice. In coastal conditions, the more controllable method often wins because it reduces dust, keeps the surface wetter for longer where needed, and gives you a cleaner transition into priming.
If you're planning an exterior repaint rather than a patch job, house painting exterior planning has to account for weather windows, not just labour.
Safety, Lead Paint, and Disposal Rules in NZ
The first question on any older North Shore house is lead, not product choice. New Zealand guidance says paint in homes built before 1970 is likely to contain lead, and the Ministry of Health advises children and pregnant people to avoid exposure during sanding or stripping (lead-paint guidance). That applies to villas, bungalows, and plenty of older state houses across the Shore, where removal work can disturb coatings that looked harmless from the outside.
Lead changes the whole plan
If a pre-1970 surface is in play, test before you start. Don't assume a top layer is safe just because it's newer, and don't dry sand blindly where dust could spread through the house or yard. That's the point where DIY often stops making sense, because containment and disposal become part of the actual job.
For chemical safety, low-VOC, water-based gels are easier to manage indoors because they're less odorous and less volatile than solvent products. Solvent strippers still have a place, but they need ventilation and a strict keep-away from ignition sources. The point isn't fear, it's matching the chemistry to the room, the weather, and the substrate.
PPE matters more than people think. A paper dust mask isn't enough for lead dust, and gloves should be chosen for the product, not just for comfort. Eye protection, disposable coveralls when dust is likely, and proper containment all belong in the setup before the first scrape.
If you don't know what's under the paint, treat the removal zone like a contamination risk until you've tested it.
Disposal is part of the job
Paint chips, stripper residue, used rags, and contaminated sanding dust can't just be thrown into kerbside rubbish in many NZ councils. They may need hazardous waste handling, especially where lead or solvent residue is involved. If a contractor is doing the work, ask how waste will be contained and removed before the quote is accepted.
This is one of the biggest gaps in consumer advice. People spend hours comparing removers, then discover the hard part is what happens after the coating comes off.
Why Paint Removal Is a Preparation Step
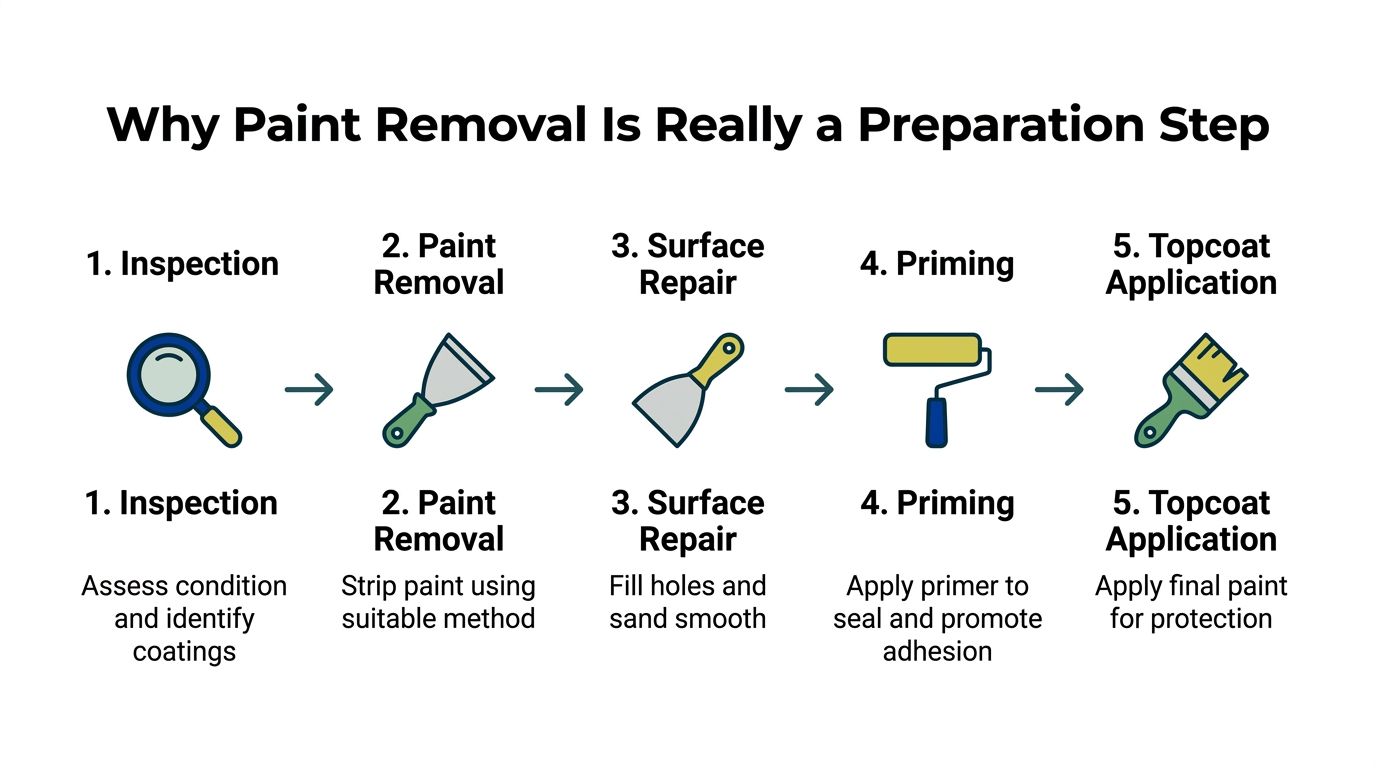
A North Shore repaint succeeds or fails on prep, not on the topcoat tin. Removal only earns its place when it fits into a sequence that leaves the substrate clean, dry, repaired, and ready for the next coating system. Strip too early or too broadly, and you can turn a manageable repaint into a bigger, riskier job than the house needed.
The workflow that holds up
It starts with inspection, because you cannot decide how much to remove until you know what is failing and what is still sound. After that comes targeted stripping or sanding, not blanket removal across every square metre. Repairs and filling then deal with the damage the old coating was hiding, and they need to be done before any new paint goes on.
Priming matters just as much as the removal step. Bare timber, metal, plaster, and masonry all need a sealer or primer that suits the substrate, because exposed material behaves differently once the old film is gone. Only then does topcoating make sense.
The common DIY mistake is stopping at “bare looks clean”. That is not a finish, it is an incomplete prep stage. If the substrate is not dry, sealed, and compatible with the chosen paint system, the new coat inherits the old problem.
The coating system does the work, not the stripping product by itself. That is why product compatibility matters so much in NZ, and why on a real repaint the remover is only one part of the job. For a simple comparison of a specific exterior element, it can help to compare exterior door painting options before assuming removal is the first move.
When to DIY and When to Hire a North Shore Painter
DIY removal makes sense when the job is small and contained. A single peeling door, a piece of furniture, or a tiny patch of flaky trim on a recent build can be manageable if you know the coating history and the substrate is sound. That's the lane where a homeowner can usually keep control of dust, timing, and cleanup.
The line moves quickly once the surface gets older, larger, or harder to access. Full exterior cedar, multi-storey work, and any pre-1970 weatherboard change the risk profile enough that the wrong method can cost more in damage than the hire saved. For a simple comparison of a specific exterior element, it can help to compare exterior door painting options before assuming removal is the first move.
Where contractor help earns its keep
A prep-led contractor handles the part most DIY jobs skip, testing the substrate, choosing the removal method for the coating, and priming properly after stripping. Painters North Shore is one option for that kind of work, using preparation-led methods, premium Resene and Dulux coatings, local crews, and a written workmanship guarantee. For harder jobs, that preparation sequence usually matters more than whichever remover was fastest on the shelf.
Once the work goes past one substrate or one safe ladder-height access point, it stops being a weekend project.
On coastal homes, the value is consistency. A contractor can shift between sanding, chemical stripping, and selective repair without turning the whole property into a dust and dry-time problem. That's the difference between taking off failed paint and creating a better base for the next system.
Your Next Step for a North Shore Repaint
Before you buy anything, answer four questions. What substrate is under the coating, and what's the existing paint system? Was the home built before 1970? How exposed is that side of the house to salt, wind, and damp? And do you need a full strip, or just a targeted repair?
If the project involves more than one substrate, lead-paint risk, or a full exterior, start with an on-site assessment instead of a remover tin. For broader exterior planning, repaint house exterior work is usually where the right preparation decision gets made, not after the stripping has already begun.
The practical move is simple. Get the surface assessed, match the method to the substrate, and don't let speed push you into unnecessary damage.
If you want a North Shore team that treats removal as part of a proper repaint, not a shortcut to bare timber, visit Painters North Shore. They handle preparation-led exterior and interior work across coastal homes, including the stripping, priming, and coating decisions that decide how long the finish lasts.


