You've washed the North Shore house, scraped the loose edges and stood back hoping the new colour will solve everything. Then the first salt-heavy season arrives. Fascia boards start chalking, a plaster patch shows through, and the sheltered side of the house grows green while the sunny elevation fades. That pattern is rarely caused by the paint brand alone. It usually points to a mismatch between coastal exposure, substrate preparation, coating build and maintenance.
Resene exterior paints can perform very well on Auckland homes, but only when they're treated as part of a complete exterior system. The right product, primer, preparation method and application rate matter more than a familiar tin or an attractive colour card.
Why Resene Exterior Paints Dominate North Shore Projects
A North Shore exterior has to cope with more than ordinary rainfall. Salt-laden air reaches coastal suburbs, strong sunlight attacks exposed films, and wind-driven rain finds weak points around joints, ledges and roofline trims. A low-quality repaint may look acceptable at handover, yet early failure often begins where the surface was dirty, damp, chalky or under-primed.
Resene's local history helps explain why the brand carries so much weight in New Zealand exterior work. The business began in Wellington in 1946, after builder Ted Nightingale developed an alkali-resistant coating for concrete because he couldn't find a suitable product on the market. Resene introduced its brand name in 1951, the same year it launched New Zealand's first waterborne paint. These milestones are recorded in Resene's company history.
Local development matters
Waterborne technology later became central to exterior painting systems used on weatherboards, plaster and other common substrates. Resene's history records a shift from its cement-based origins towards a waterborne focus by 1977, while 1975 saw the company introduce New Zealand's first full range of testpots. That development made exterior colour selection more precise, particularly for homeowners comparing subtle changes across weatherboards and trims.
The local connection is practical, not just nostalgic. Resene states that it has remained privately New Zealand owned and operated since 1946, and its domestic history is closely tied to the development of waterborne coatings and retail colour systems. For North Shore projects, that gives homeowners access to a brand with long experience in local construction materials and environmental conditions.
Practical rule: A New Zealand brand doesn't remove the need for diagnosis. It gives you a stronger starting point, but the coating still has to suit the surface and exposure.
Why the brand alone isn't enough
I've seen sound products fail because contractors painted over salt deposits, mould staining or powdery old coatings. I've also seen less glamorous surfaces last well because the team washed thoroughly, allowed the substrate to dry, repaired defects and used the correct primer.
Resene's technical guidance makes the order clear. Select the substrate and environment first, then choose the paint type. That approach is particularly important on North Shore homes where one elevation may be sheltered and another may face persistent coastal weather. A weatherboard wall, a plastered façade and a sloping fascia don't experience the same conditions, so they shouldn't automatically receive the same preparation or coating specification.
Understanding Acrylic Binders and Film Build Specifications
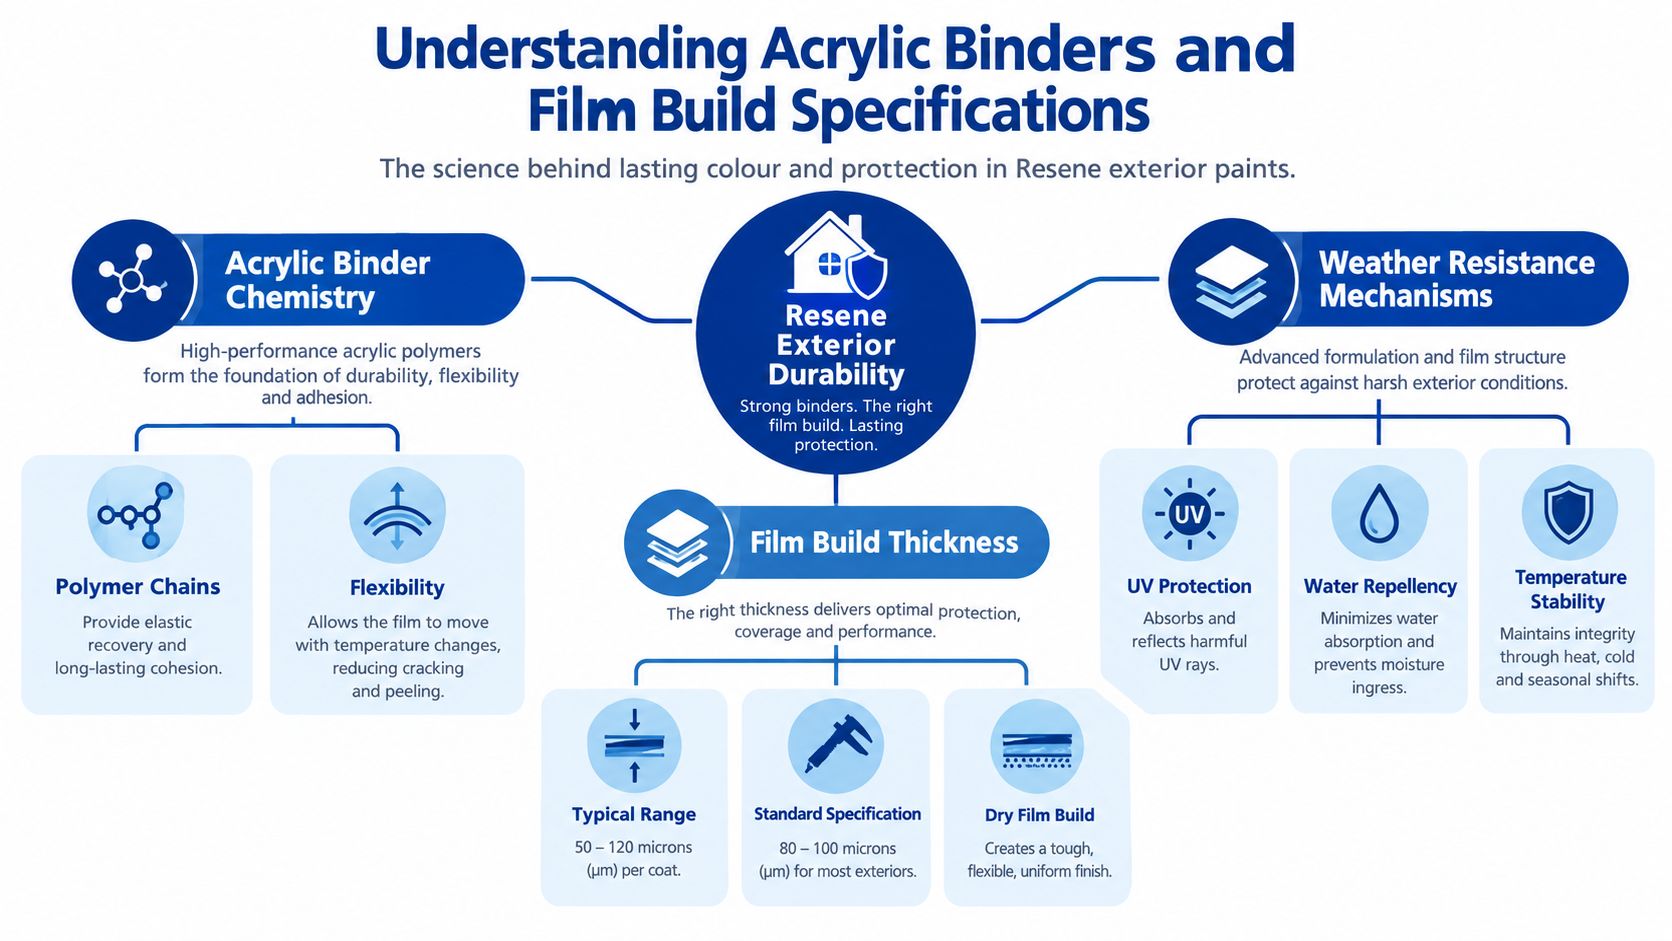
Exterior durability starts inside the paint film. Colour provides the visible result, but the binder holds pigment together, adheres the coating to the substrate and allows the film to cope with ordinary movement. In a typical Resene Crown Exterior Semi-Gloss system, the data sheet specifies a 100% acrylic binder, which supports adhesion, flexibility and washability when the product is applied to a properly prepared surface.
What the specification tells you
The same Resene Crown Exterior Semi-Gloss data sheet lists 10 m²/L coverage, a 40-micron dry-film thickness at that spread rate, a 45-minute dry time at 20°C, a 2-hour recoat time and a two-coat application. Those figures aren't decoration for a technical document. They define the amount of material needed to create the intended protective film.
A painter who stretches the product beyond its specified coverage reduces film build. The surface may still look coloured, but the coating has less material protecting it from ultraviolet exposure, moisture and repeated expansion and contraction. On a North Shore elevation, that shortcut can show up as early chalking, uneven sheen or breakdown around exposed edges.
The drying figures also need context. A manufacturer's dry time assumes stated conditions, while coastal work may involve cool air, high humidity, shade or sudden showers. Recoating too soon can trap moisture or disturb the first film. Recoating too late after contamination can create another adhesion problem. Good site practice means checking the actual surface, not relying blindly on the clock.
Why two coats and correct spreading matter
Acrylic chemistry can only do its job when the film is continuous and sufficiently thick. Under-application leaves weak spots around board edges, nail heads, repaired areas and textured plaster. These locations often weather first because they have different porosity or geometry from the main face.
Professional application therefore involves more than buying a premium product. The crew needs to measure or estimate the surface area accurately, allow for porosity and texture, and maintain the manufacturer's spread rate. A rough substrate may consume more material than a smooth one. A heavily weathered wall may also require additional preparation and spot priming before the specified topcoats are applied.
The expensive shortcut is rarely the paint itself. It's paying for access, scaffolding and labour, then weakening the system by applying too little material.
Substrate Diagnosis and Preparation for Coastal Homes
The most useful question isn't “Which Resene exterior paint should I buy?” It's “What condition is this surface in, and what does it need before coating?” North Shore houses often combine materials from different renovation periods, so a single façade may include old timber, newer fibre cement, plaster repairs, brickwork and metal flashings.
Start by identifying moisture, movement and contamination. Resene's exterior guidance requires moss and mould to be killed before washing, while chalk, dirt and other contaminants must be removed before coating. A pressure washer can clean a surface, but it can also drive water into joints or damage soft timber when used carelessly.
Weatherboard and cedar
Weatherboards need a methodical inspection. Look for peeling edges, open joints, failed putty, exposed end grain and areas where the timber has softened. Scrape loose material, sand the remaining edges so the transition is gradual, repair defects with compatible fillers and prime bare or exposed areas according to the product system.
Cedar deserves extra care because tannins and surface oils can interfere with adhesion and colour. Don't assume a waterborne topcoat can go directly over every aged timber surface. The correct primer, dry substrate and sound old coating matter more than choosing a fashionable finish. Homeowners comparing systems for timber can also review this practical guide to the best paint for weatherboards in New Zealand.
Plaster and monolithic cladding
Plaster requires a moisture-conscious inspection. Check cracking, powdery areas, failed repairs, mould and signs that water is entering around penetrations or junctions. Washing and killing biological growth comes first. Once dry, remove chalkiness and use the primer specified for the condition of the plaster, rather than treating the façade like timber.
A new or sound plaster surface may need a different sealer from an aged, previously painted one. Hairline movement, larger cracks and failed sealant also require different repairs. Painting over movement doesn't stop it, and a flexible-looking topcoat won't compensate for water entering behind the cladding.
Brick, block and mixed surfaces
Brick and block are porous, uneven and often contaminated by salts or biological growth. Clean carefully, allow sufficient drying, and check whether the surface needs a masonry sealer or a product designed for the substrate. Don't use a universal primer just because it's already on the ute.
For every substrate, document the preparation before painting:
- Wash and treat: Remove salt, dirt, mould and moss using a method appropriate to the surface.
- Scrape and sand: Eliminate loose coating and soften sharp paint edges.
- Repair movement: Fix cracks, failed joints and damaged timber before priming.
- Prime selectively: Use the specified primer on bare, porous, stained or repaired areas.
- Check dryness: Don't seal moisture into the wall or timber.
The topcoat only protects what sits beneath it. If the substrate is unstable, the new finish inherits that problem.
Comparing Resene and Dulux for Professional Applications
Professional painters don't choose between Resene and Dulux by brand reputation alone. They compare the specific product, substrate, finish, exposure and system instructions. Both manufacturers offer credible exterior options, and either can produce a poor result when the surface is contaminated or the application is rushed.
Resene has a particularly strong place in New Zealand colour specification and local architectural work. Its testpot history and dedicated colour-shopping model support detailed colour selection, while its technical documentation gives contractors system information for different substrates and exposure conditions. Dulux also has established exterior ranges and specialist systems, which can suit particular masonry, plaster or membrane requirements.
| Feature | Resene Systems | Dulux Systems |
|---|---|---|
| Local colour specification | Strong colour consultation and a broad local colour system | Broad colour availability with strong tinting capability |
| Timber weatherboards | Suitable systems are available when matched with correct preparation and primer | Suitable systems are available when specified for the timber condition |
| Plaster and masonry | Offers substrate-specific primers and exterior coatings | Offers exterior products and membrane-style options for selected surfaces |
| Trade support | Dedicated colour shops and architectural specification support | Wide trade distribution and established commercial product lines |
| Professional decision | Useful where colour, local specification and system continuity are priorities | Useful where a particular product, finish or commercial system fits the substrate |
Where the systems differ in practice
On a timber home, the key issue is moisture movement, edge sealing and the condition of the existing coating. On plaster or masonry, porosity, cracking and moisture management may carry more weight. A contractor should be able to explain why a particular primer and topcoat were selected, regardless of the logo on the tin.
Colour can also decide the system. If the project has been designed around a Resene palette, staying within that system may simplify colour matching and future touch-ups. Availability can matter too, particularly for larger managed properties where the same product may need to be sourced for staged work.
For coastal property owners, this comparison of exterior paint for coastal homes is useful as a starting point, but an on-site assessment should still determine the final specification.
A fair comparison asks which system fits this wall, not which brand wins in the abstract.
Managing Maintenance Cycles in Salt-Laden Environments
A coating doesn't reach the end of its useful life on one universal date. Exposure angle, substrate condition, colour, rain washing and maintenance all change the timing. Resene's technical guidance says exterior stain systems may need maintenance about every third summer, while solid exterior paint systems are typically maintained around 8 to 9 years for appearance. These are general guides, not promises for every North Shore property.
The exposure geometry is especially important. Resene states that exterior life figures apply to vertical surfaces only. Surfaces angled less than 60 degrees to horizontal have about 50% of the stated service life, and a 45-degree roof exposure can weather about twice as fast as a vertical surface, as described in Resene's exterior maintenance guidance.
Build an inspection routine
Roofline fascias, sloping trims, ledges and sheltered recesses deserve separate attention. They may receive stronger sunlight, hold moisture or miss the natural rinsing that vertical walls get from rain. Salt deposits can remain on surfaces that look clean from the ground, particularly under eaves and on elevations protected from prevailing weather.
Resene recommends annual wash-downs in exposed areas, especially where surfaces don't receive regular rain washing. A practical maintenance routine includes:
- Annual observation: Check chalking, fading, mould, cracking and peeling before symptoms spread.
- Gentle cleaning: Remove salt and biological growth without damaging the existing film.
- Targeted repairs: Address failed sealant, exposed timber and local coating damage early.
- Recorded inspections: Note which elevations and materials weather faster for future budgeting.
- Planned repainting: Schedule preparation and access before the coating reaches widespread failure.
For a property manager, this changes the budget conversation. Instead of waiting for a tenant or body corporate committee to report peeling paint, inspect exposed assets and plan work around the areas that weather first. A vertical wall may remain sound while fascia boards and sloping details need earlier intervention.
A maintenance cycle also protects the next repaint. Washing and small repairs preserve adhesion and reduce the amount of scraping, filling and replacement required later. The hidden lifecycle cost isn't only the topcoat. It includes access equipment, preparation hours, disruption, timber repairs and the risk of repainting sound areas just because neglected details have failed.
Navigating Colour Selection and CoolColour Technology
Dark exterior colours can look excellent on North Shore homes, but colour selection should account for more than the view from the street. Sunlight changes through the day, nearby water and pale surfaces can increase reflected brightness, and dark coatings can contribute to greater heat absorption on exposed materials.
Resene's CoolColour technology is designed to let homeowners use darker architectural colours while reducing some of the heat-related stress associated with conventional dark coatings. It doesn't remove the need for suitable substrate preparation, sound cladding or correct application. It's one tool within the specification, not a substitute for a complete system.
Test the colour on the actual house
Colour cards are useful for narrowing choices, but they don't show how a finish behaves across a large wall. Use physical testpots on representative areas, including a sunny elevation and a shaded side if possible. Observe the sample in morning, midday and late light, and compare it against roofing, paving, joinery and landscaping.
Resene's history records that the company introduced its first full range of testpots in 1975, supporting more accurate exterior colour selection. That matters because small painted samples can look very different from a broad façade, particularly when the surface is textured or the surrounding environment reflects strong light.
Consider the maintenance implications of the colour as well. A deep tone may make chalking, salt marks and uneven fading more visible than a restrained mid-tone. That doesn't mean avoiding dark colours. It means specifying the product technology, preparation and washing routine with the desired appearance.
For practical inspiration, review these exterior paint palettes for North Shore homes, then test shortlisted colours on the property rather than choosing solely from a screen.
A sensible selection sequence
- Assess the exposure: Identify elevations facing strong sun, wind and coastal air.
- Check the substrate: Confirm whether the surface can accept the chosen system.
- Test the colour: Paint samples on the actual cladding and inspect them in changing light.
- Discuss technology: Ask whether CoolColour or another specified system suits the colour and substrate.
- Plan upkeep: Accept that dramatic colours may need closer visual monitoring.
The best colour decision balances design intent with the way the building will be cleaned, inspected and maintained.
The Value of Preparation-Led Professional Painting
Premium Resene exterior paints are only one part of a durable repaint. The other part is the preparation-led workflow that gets the substrate ready to receive them. A contractor who spends time washing, scraping, repairing, sanding and priming can make a greater difference to the outcome than a homeowner choosing between two similar premium topcoats.
A quote should describe the work beneath the colour. Look for clear answers to these questions:
- Surface cleaning: How will the crew remove salt, mould, moss, dirt and chalk?
- Defect repair: Which cracks, joints, nail holes and damaged boards are included?
- Primer selection: Which primer suits each substrate, repair and stain?
- Application method: What spread rate, number of coats and drying conditions will apply?
- Access and protection: How will windows, plants, paths and neighbouring areas be protected?
- Maintenance advice: What should the owner wash, inspect and record after completion?
What a sound system looks like
A weatherboard project may need local timber repairs, sanding, spot priming and carefully applied acrylic coats. A plaster façade may require crack repairs, moisture investigation, sealer and a different approach to texture. Brick and block can need cleaning, drying and masonry-specific preparation. Treating every surface as if it were a flat interior wall is how hidden defects become visible under a new finish.
The same principle applies to exterior cleaning generally. If you're comparing methods for removing biological growth and surface contamination before painting, this exterior cleaning services overview provides useful background on why cleaning needs to be matched to the surface and the type of buildup.
Painters North Shore works across residential and commercial properties with Resene and Dulux systems, including exterior preparation, substrate-matched primers, colour consultation and application. The useful distinction is not just whether a contractor names Resene. It's whether the written scope shows how the team will diagnose and prepare the property before opening the topcoat.
A durable exterior is built in the preparation stage, then protected by the paint film.
Ask for an on-site assessment rather than a colour-only estimate. The contractor should identify the coastal exposure, separate the substrates, explain likely maintenance zones and state what is included if loose paint, mould or substrate damage is discovered. That level of clarity helps homeowners, property managers and body corporates compare quotes on the work that controls durability.
If your North Shore property needs a Resene exterior paint specification, Painters North Shore can assess the substrate, exposure and preparation requirements before recommending a system. Visit Painters North Shore to arrange an on-site assessment and discuss a clear, preparation-led repaint plan.