You're standing in the paint aisle, holding three sample pots that all looked “safe” in the shop. Back at home, one turns blue in the lounge, one looks yellow in the hallway, and one somehow makes a freshly plastered wall look worse. That's the part most white wall paint articles skip. White isn't simple, and on Auckland's North Shore it's even less forgiving.
A good white can clean up a tired villa, sharpen a new build, and make a dark room feel less heavy. A bad one can look flat by lunch and cold by evening. The stakes aren't just visual either. The New Zealand paint and coating manufacturing industry is projected to reach $844.2 million in 2026, and freshly painted neutral homes in NZ can sell 2–3 weeks faster and for 2–5% more than comparable properties needing paint work, according to IBISWorld's New Zealand paint and coating manufacturing industry data.
That's why white wall paint deserves more care than it typically receives. On the North Shore, coastal light, sea air, condensation, old plaster, new plasterboard, and timber movement all change what works.
The Deceptively Difficult Choice of White Paint
Most homeowners start with the same assumption. White is neutral, so any white should do. Then they roll a test patch on the wall and realise white has more personality than half the colours in the fan deck.
In a Devonport villa, a crisp white can bounce around every surface and make patched walls stand out. In an Albany new build, that same colour can feel clean and controlled if the plasterboard is straight and the natural light is balanced. The paint tin didn't change. The room did.
Why white goes wrong so often
White wall paint fails for a few common reasons:
- The undertone was ignored. What looked neutral in-store had a pink, grey, blue, or cream cast once it hit the wall.
- The room's light wasn't considered. North Shore homes get changing coastal light, and that can flatten some whites and exaggerate others.
- The finish was chosen for looks only. A flat-looking wall may suit a bedroom, but it won't always cope well in a busy hallway or a damp corner.
- The surface wasn't ready. White paint reveals dents, filler marks, sanding scratches, and flashing faster than deeper colours do.
Practical rule: White is never just a colour choice. It's a combined decision about undertone, finish, surface prep, and the way your room receives light.
The best results usually come from slowing down at the selection stage. Test fewer whites, but test them properly. Put them on the actual wall. Look at them in the morning, in the middle of the day, and again under lights at night. A white that behaves well across all three is usually the one worth using.
Decoding Undertones and North Shore Light
Undertone is the hidden colour inside the white. It might be warm, cool, or close to neutral, but it's always there. If you don't spot it before painting, the room will spot it for you.
A simple way to think about it is this. White wall paint is like a glass of water with a drop of something added. Add a drop of yellow, red, or pink and it warms up. Add a drop of blue, green, or grey and it cools down. Keep the drop small and the paint may still look “white” on a card. Cover a full wall with it and that hidden note becomes obvious.
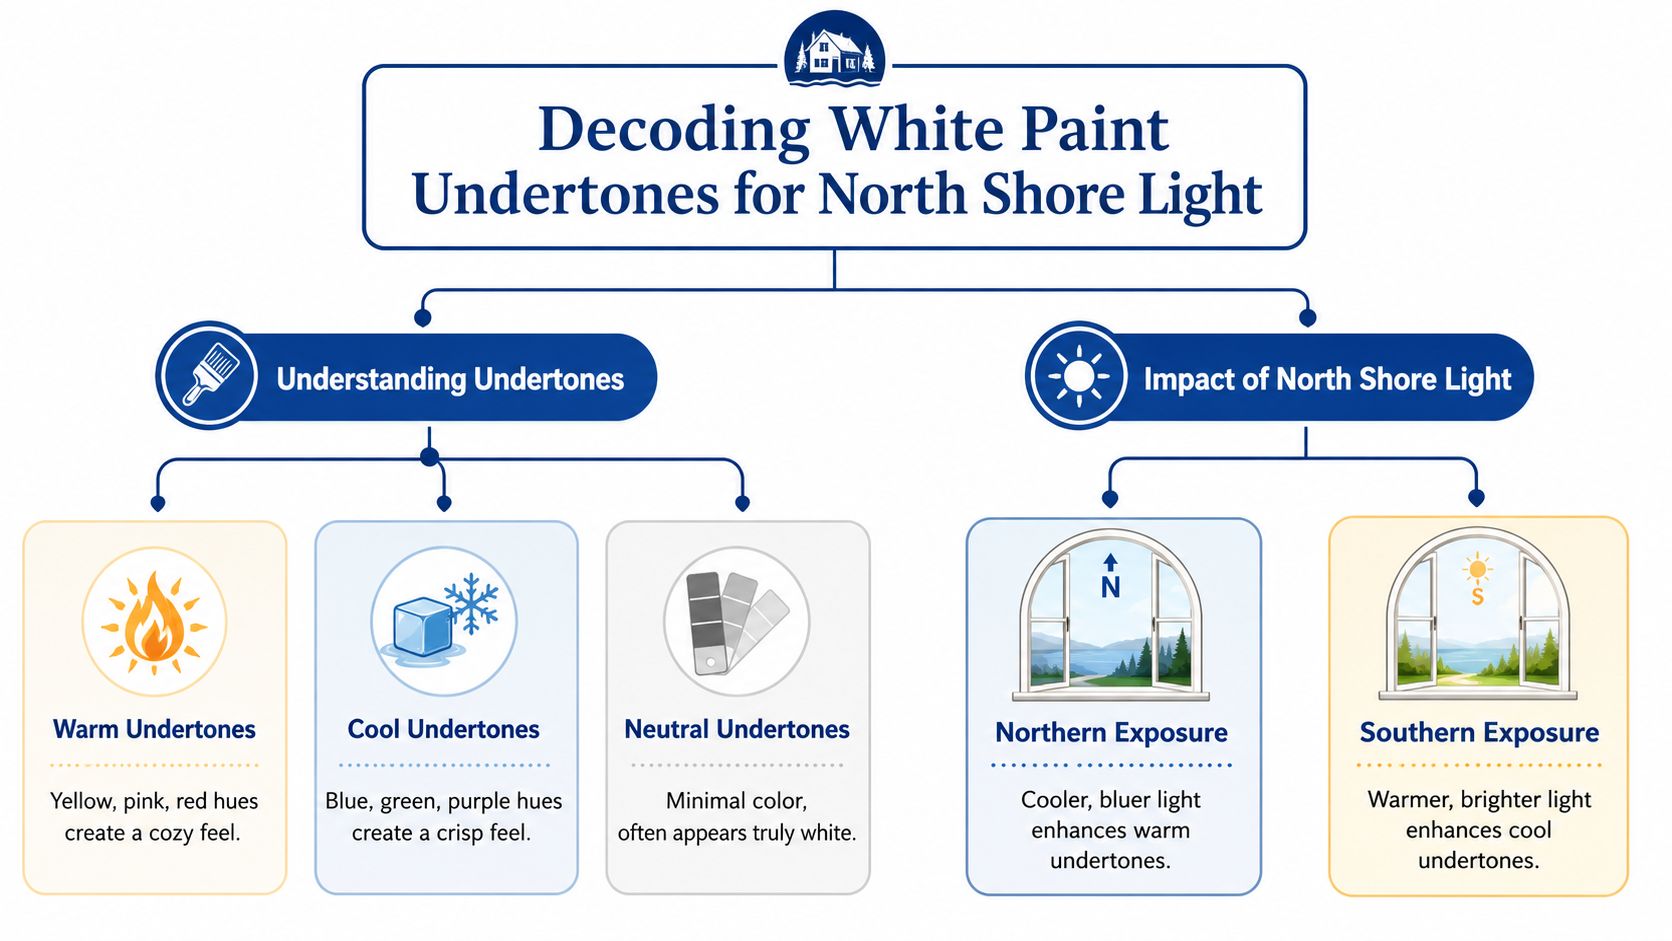
Warm, cool, and balanced whites
Warm whites tend to suit older homes, timber floors, and rooms that need softening. They can stop a space from feeling clinical. Used badly, they can drift creamy or muddy.
Cool whites work well where you want a sharper finish. They often suit more modern interiors, cleaner lines, and brighter rooms. Used badly, they can turn sterile fast.
Balanced or near-neutral whites sit in the middle. They're often the safest starting point when a home has mixed flooring, mixed trim colours, or changing light through the day.
What North Shore light does to white paint
Generic advice often proves insufficient. Auckland's coastal light changes white more than most homeowners expect. Resene notes that natural daylight “soaks up pigment”, which is why stronger colour strengths are often recommended for coastal NZ homes. Resene also notes that in coastal zones, white paint often needs 3 coats plus a grey-tinted primer to prevent undertone drift, as explained in this Resene guide to choosing the right white.
That matters on the North Shore because bright but shifting daylight can wash a white out one hour and make its undertone jump out the next. The sample that looked soft in the shop can look stark on a Takapuna wall or strangely dull in a Browns Bay hallway.
A white that seems “clean” on a paint chip can look empty on a full wall if the room doesn't feed enough useful light back into it.
How to test whites properly at home
Don't choose from the smallest sample. Use larger test areas on more than one wall if you can. Then check these conditions:
Morning light
Coastal light early in the day can bring out coolness and make some whites feel thinner than expected.Midday light
This is often when washed-out whites show their weakness. If the paint loses body, it may need a stronger white or a different undertone.Night lighting
LEDs, warm lamps, and pendant lighting can shift a white again. A white that survives both daylight and artificial light is usually the better all-rounder.
If a room feels tricky, don't jump straight to the brightest white. On the North Shore, the strongest-looking white in the shop often isn't the one that looks best on the wall.
Selecting a Finish for Durability and Style
A white wall on the North Shore can look sharp on day one and tired six months later if the finish is wrong. I see it often in Milford, Devonport, and Long Bay. The colour choice is fine, but the sheen does not suit the house, the moisture load, or the way the room is used.
Finish controls two things that matter in real homes. How much the wall shows, and how easy it is to clean. With white paint, those two rarely line up perfectly.
The trade-off homeowners get wrong
Lower-sheen finishes are more forgiving. They soften plasterboard joints, old patch repairs, and the slight waviness you get in many villas and older block homes. That matters on the North Shore because strong coastal light coming through large windows will pick up every bump by mid-afternoon.
Higher-sheen finishes clean up better, especially in busy family homes, but they show more. If the stopping is average, the sanding is rushed, or the wall has been patched a few times over the years, satin will make that obvious. White paint is not kind to poor prep, and extra sheen makes it harsher again.
For a broader look at practical paint choices for different parts of the house, it helps to match the finish to the room before locking in the product.
What usually works room by room
Low sheen for most walls
This is the safest choice for living rooms, dining spaces, bedrooms, and hall walls that get normal wear. It gives enough wipeability for everyday marks without flashing every surface defect back at you.Satin for hard-working areas
Use it where walls get touched, scuffed, or exposed to moisture more often. Kitchens, laundries, kids' rooms, and some rental hallways are the usual candidates. Just be honest about the wall quality first.Flat or very low-sheen finishes for quieter spaces
These can look excellent in adult bedrooms or formal rooms where you want a softer, chalkier look. They are less forgiving with fingerprints and harder to spot-clean without leaving a visible patch.
Villas and new builds need different judgement
Older villas in places like Belmont or Birkenhead usually reward restraint. Their walls often have years of movement, layered repairs, and trim lines that are not perfectly straight. A low-sheen white generally looks better because it works with the character of the house instead of highlighting every age mark.
New builds in Albany or Long Bay are a different job. If the GIB stopping is clean and the lines are sharp, a slightly more washable finish can work well in selected areas. The risk is overdoing it. A bright white in a satin finish across a whole open-plan room can start to feel hard and reflective, especially under LEDs at night.
Furniture matters too. White walls do not sit in isolation. Sofas, curtains, flooring, oak joinery, and black window frames all shift how the room reads, so it helps to review colors that complement white decor before settling on the final look.
The best white finish is the one that suits the wall underneath it and the life happening around it.
Recommended Resene and Dulux Whites for Auckland Homes
There's no single best white wall paint for every North Shore house. There are, however, whites that regularly behave better in local conditions than others. The shortlist below is useful because these colours are commonly considered by Auckland homeowners and suit a range of villas, townhouses, and newer builds.
Before choosing any of them, sample them on your own walls. The right white for a Milford weatherboard bungalow may not be the right one for a Long Bay new build with large glazing.
A practical shortlist
Resene Alabaster
A dependable soft white for homes that need warmth without going creamy. It tends to sit well with timber flooring, older skirtings, and spaces that feel a bit cold in winter light.
Resene Black White
Often chosen where the goal is a more modern, pared-back look. It can read cooler and cleaner, so it needs careful testing in rooms that don't get enough flattering natural light.
Dulux Cardrona
A useful choice when homeowners want an off-white feel that's still light and livable. It often suits open-plan homes where a stark white would feel too sharp.
Resene Sea Fog
A soft, flexible white that can help bridge older and newer materials in the same house. It usually works well where there's a mix of painted trim, timber, and neutral furnishings.
Dulux Mt Aspiring
A cleaner, fresher white often considered for brighter interiors and simpler contemporary spaces. Like all cleaner whites, it needs proper sampling before committing.
If you're comparing brands and planning a full repaint, it also helps to review broader options for house paint systems and product choices so the wall colour isn't picked in isolation from the rest of the home.
Popular Resene and Dulux Whites Compared
| Paint Name | Brand | Undertone | Light Reflectance Value (LRV) | Best For |
|---|---|---|---|---|
| Resene Alabaster | Resene | Warm | Not cited here | Villas, family homes, rooms needing softness |
| Resene Black White | Resene | Cool to neutral | Not cited here | Modern interiors, sharper styling |
| Dulux Cardrona | Dulux | Warm to neutral | Not cited here | Open-plan homes, softer neutral schemes |
| Resene Sea Fog | Resene | Neutral | Not cited here | Mixed-material interiors, flexible whole-home use |
| Dulux Mt Aspiring | Dulux | Cool to neutral | Not cited here | Bright rooms, cleaner contemporary look |
Why the table doesn't force a winner
A lot of homeowners want a chart that spits out the answer. White doesn't work like that. The table is for narrowing your shortlist, not for making the final call.
The key variable is still the room itself:
- If the room feels blue or flat, start with a warmer or more balanced white.
- If the room already feels creamy, avoid whites that add more yellow.
- If the home is modern and bright, cooler whites may hold their edge better.
- If the home mixes old timber and new finishes, a restrained neutral white usually gives fewer surprises.
The smartest approach is to shortlist two or three whites, test them in the actual room, and ignore how they looked under shop lighting.
The Non-Negotiable Step Preparation and Priming
Most failed white wall paint jobs aren't colour failures. They're surface failures. The white just exposes them.
A wall can look acceptable before painting and still look rough once the topcoats go on. White paint is especially unforgiving because it doesn't hide much. It reflects light across every patch, ridge, sanding scratch, and roller lap.

Why prep matters more with white
Achieving a Level 5 finish on paper-faced plasterboard requires a high-build basecoat such as Resene Broadwall Surface Prep & Seal to equalise porosity and reduce textural differences before white topcoats go on, as outlined in Resene's guidance on surface preparation and environmental product systems. That matters because white paint has low tinting strength, so it amplifies substrate irregularities instead of masking them.
In simple terms, the wall has to be built properly before it can be painted properly.
Trade secret: If you can still see patchiness or flashing after primer, don't hope the topcoats will fix it. They usually make it more obvious.
What proper prep looks like
On North Shore jobs, the prep sequence changes with the substrate, but the logic stays the same.
Wash first
Salt residue, kitchen film, dust, and hand marks interfere with adhesion. Coastal houses collect more airborne grime than many owners realise.Fill and sand properly
Not just the obvious dents. White picks up skim edges, hollow patches, and rough stopping lines.Spot-prime repairs
Filler and raw areas absorb differently from surrounding paint. If they aren't sealed correctly, you get flashing through the finish.Use the right basecoat
On fresh plasterboard or problem surfaces, a high-build prep coat can make the difference between a flat-looking wall and a patchy one.
Villas and new builds need different treatment
Heritage villas often need more corrective prep. Old walls may have hairline cracks, layers of previous paint, repairs from different eras, and trim timber that's moved. Those surfaces reward patience. Rush them and the white finish looks nervous.
New builds usually present a different issue. The lines are straighter, but that also means side light and ceiling downlights reveal every join and stopping inconsistency. A clean modern white only looks expensive when the plasterboard finish underneath is equally controlled.
For a quick visual primer on clean interior technique, this demonstration is useful:
A perfect white wall isn't made by the last coat. It's made by everything done before it.
DIY Project vs Hiring Painters North Shore
A Saturday repaint in Milford or Devonport often starts the same way. The room looks simple, the white seems safe, and the plan sounds manageable until the afternoon sun hits the wall and every roller line shows up.
White is unforgiving on North Shore interiors for a few local reasons. Strong coastal light exposes lap marks that looked invisible in the tray-to-wall rush. Older villas often have walls that are far less straight than they appear at first glance. Newer homes in places like Long Bay or Hobsonville tend to have sharper lines and more glazing, which means side light picks up cut-in errors, patchy coverage, and uneven texture fast.

When DIY is a fair call
DIY makes sense on a small room with sound walls, decent access, and enough time to do the job properly. A spare bedroom, study, or low-traffic guest room is usually a better candidate than a main hallway, stairwell, or open-plan living area where defects are easier to spot and harder to fix cleanly.
It also suits homeowners who can work methodically. That means allowing for sanding dust, dry times, furniture movement, masking, lighting checks, and a second look at the walls before the first coat goes on. White punishes rushed decisions.
Where DIY jobs usually drift off course
The first problem is timing. Homeowners often budget for painting hours and ignore the time needed to set up, patch, sand, vacuum, mask, cut in, and keep a wet edge across a full wall.
The second is technique. White does not hide inconsistent roller pressure, overloaded sleeves, or cut-in that starts drying before the main field is rolled. In North Shore homes with big windows and reflective sea light, those flaws are clearer than they would be in darker rooms or softer inland light.
The third is judgement. A wall may need another coat, a different sleeve nap, or a stain-sealing spot prime in one area only. DIY painters usually have the effort. What they often lack is the experience to spot the problem early enough to avoid rework.
If the room is being refreshed for sale, paint should support the broader presentation of the house. This expert guide to home preparation is a useful companion for getting the whole space ready, not just the walls.
What you are paying for with a professional crew
Hiring Painters North Shore is not just about getting labour on site. You are paying for control over the finish.
A good painter knows which walls need extra correction before white goes on, where coastal humidity will slow curing, how to keep the cut-in and rolled sections blending evenly, and when a “quick repaint” has underlying issues that will show straight through a fresh topcoat. That matters in heritage homes with old repairs and in new builds where sharp light reveals every inconsistency.
Professional value also shows up in the parts homeowners rarely price properly. Protection of floors and joinery. Faster turnaround. Less disruption. Fewer callbacks on missed patches, flashing, picture-hook repairs, and rough lines around trims and ceilings.
For homeowners comparing quotes, this guide to choosing reliable painting contractors in Auckland helps separate a careful operator from someone pricing low and fixing problems later.
A clean white finish comes from sound judgement, controlled technique, and enough preparation to keep the final coats even under real North Shore light.
The difference is usually obvious a few months later. The walls still look even in morning and afternoon light. Touch-ups have a better chance of blending. The room feels finished, not just repainted.
Maintaining and Protecting Your White Walls
Fresh white walls look sharp on day one. Keeping them that way is mostly about small habits, not heroic cleaning.
The biggest mistake is scrubbing too hard, too soon, or with the wrong product. Even durable white wall paint can burnish if it's attacked with abrasive pads or harsh cleaners. Once that sheen change happens, the mark may be gone but the patch still shows.
A simple maintenance routine
Dust first, wipe second
Dry dust on a cloth or sponge can act like fine grit. Remove loose dust before you tackle marks.Treat marks lightly
Use a soft cloth and mild cleaner. Start with the gentlest method and work up only if needed.Keep a labelled touch-up pot
Write the product name, colour, and finish on the lid. White touch-ups fail most often because the wrong sheen gets used, not just the wrong colour.Watch problem zones
Hallways, stairwells, around light switches, and beside beds collect marks earlier than formal living spaces.
Dealing with common white-wall issues
If a white wall starts looking dull, check whether it's actual staining or just grime build-up from traffic and ventilation. Kitchens and entry areas often need more frequent light cleaning than bedrooms.
If you notice recurring spotting or mildew risk in damp areas, the coating system may need to be reviewed rather than cleaned. In those cases, guidance on mould-resistant paint options can help you decide whether the problem is maintenance-related or product-related.
For homeowners who want a more structured routine for the rest of the house as well, resources on Find reliable home cleaning can be useful for building a regular maintenance plan around high-use spaces.
When touch-ups don't blend
White touch-ups usually fail for one of three reasons:
- The wall has aged unevenly
- The original finish had more sheen than expected
- The paint wasn't stirred or matched properly
Don't keep dabbing at the same patch. If the touch-up flashes from the surrounding wall, repaint the whole section from corner to corner.
That's the cleanest way to preserve the look of white wall paint over time.
If you want a white finish that suits North Shore light, survives real household use, and doesn't expose every flaw in the wall, talk to Painters North Shore. They handle interior repaints across Auckland's North Shore with preparation-led systems, premium Resene and Dulux products, and local experience with everything from old villas to modern homes.