You notice the paint lifting beside a window, then spot a dark mark under the eaves. The colour has faded, but the bigger question is whether water is getting behind the cladding. A fresh coat may improve the view from the street, yet it won't fix damp timber, failed sealant or a leaking junction.
That's why hiring local exterior painters should start with diagnosis, not a colour chart. A capable contractor will assess the surface, its exposure and the signs of moisture before recommending a coating system. The right questions at the start can help you avoid paying for a tidy finish that doesn't last.
Why Hiring the Right Local Exterior Painter Matters
A peeling weatherboard can look like a straightforward repaint. But if the paint is failing around a window or where two materials meet, the cause may be water entering through a joint, not an old coating. Painting over that area without finding the source can conceal the symptom while the underlying problem continues.
Exterior paint does more than change a home's appearance. Along with sound cladding, sealed junctions and proper drainage, a suitable coating helps protect exposed surfaces from weather. The work is only as dependable as the preparation beneath it: a painter who washes and primes carefully but misses a persistently damp substrate hasn't solved the problem.
Local conditions change the job
North Shore properties face different combinations of sunlight, sea spray, wind and shelter. A coastal façade may collect salt and dry unevenly, while a shaded wall can stay damp longer than a sunny elevation. Those differences affect when a painter can work, how the surface should be prepared and which coating system makes sense.
A useful comparison is exterior painting for Florida homes, which offers a perspective on how local climate shapes exterior preparation and coating decisions. The specific products and conditions differ, but the broader lesson holds: paint selection should follow an assessment of the building and its environment.
The hiring decision starts before colour
A sound assessment should cover the cladding, joints, eaves, flashings, exposed timber and existing paint. Ask whether the painter will investigate bubbling, recurring peeling, stains or soft timber before quoting a finish. If the answer is “we'll sand it and paint it”, ask what they've checked for moisture and water entry.
The price of choosing poorly isn't limited to another repaint. You may also need to pay for repairs that could have been identified before the work began. Treat the hire as a sequence: check the contractor, understand the scope, confirm the preparation, then choose colours and finishes.
How to Vet Local Exterior Painters
Screen contractors by how they assess and explain the work, not by how polished their website looks. A slick gallery says nothing about how a crew handles damp cladding or failed sealant once the scraping starts.

Check credentials and relevant work
Start by asking for evidence of current insurance and any applicable trade credentials. Request references for recent exterior jobs on surfaces like yours, whether that's weatherboard, cedar, plaster or fibre cement. If you can, view a completed project and look closely at edges, joints and trim rather than judging only the overall colour.
Online ratings give useful context, so read the comments for specifics. Do clients mention preparation, communication and follow-up, or only how quickly the crew finished? Painters North Shore, for example, lists a substantial number of completed residential and commercial projects and a high NoCowboys rating backed by verified reviews. Treat any contractor's published track record as one part of your assessment, not a substitute for checking the proposed scope.
Ask questions that reveal the process
During the site visit, ask the painter to walk you through what they'll inspect. The answers that matter most concern moisture. Will they meter suspect timber, probe soft spots and trace stains back to a water entry point before quoting? Ask how they'll deal with failed coatings and what would make them pause the job for further assessment. Ask which products they propose and why those products suit your cladding and exposure. A strong answer connects the coating to the substrate and conditions instead of leaning on a phrase like “premium paint”.
You can also use this guide on vetting contractors before hiring as a prompt for comparing candidates. Before signing, confirm that the quote is written, the work is itemised and any workmanship guarantee is clear.
Watch for red flags: vague answers about moisture checks, refusal to break down the scope, pressure to sign immediately, or a promise to cover every defect with paint.
Coastal Coating Requirements for North Shore Homes
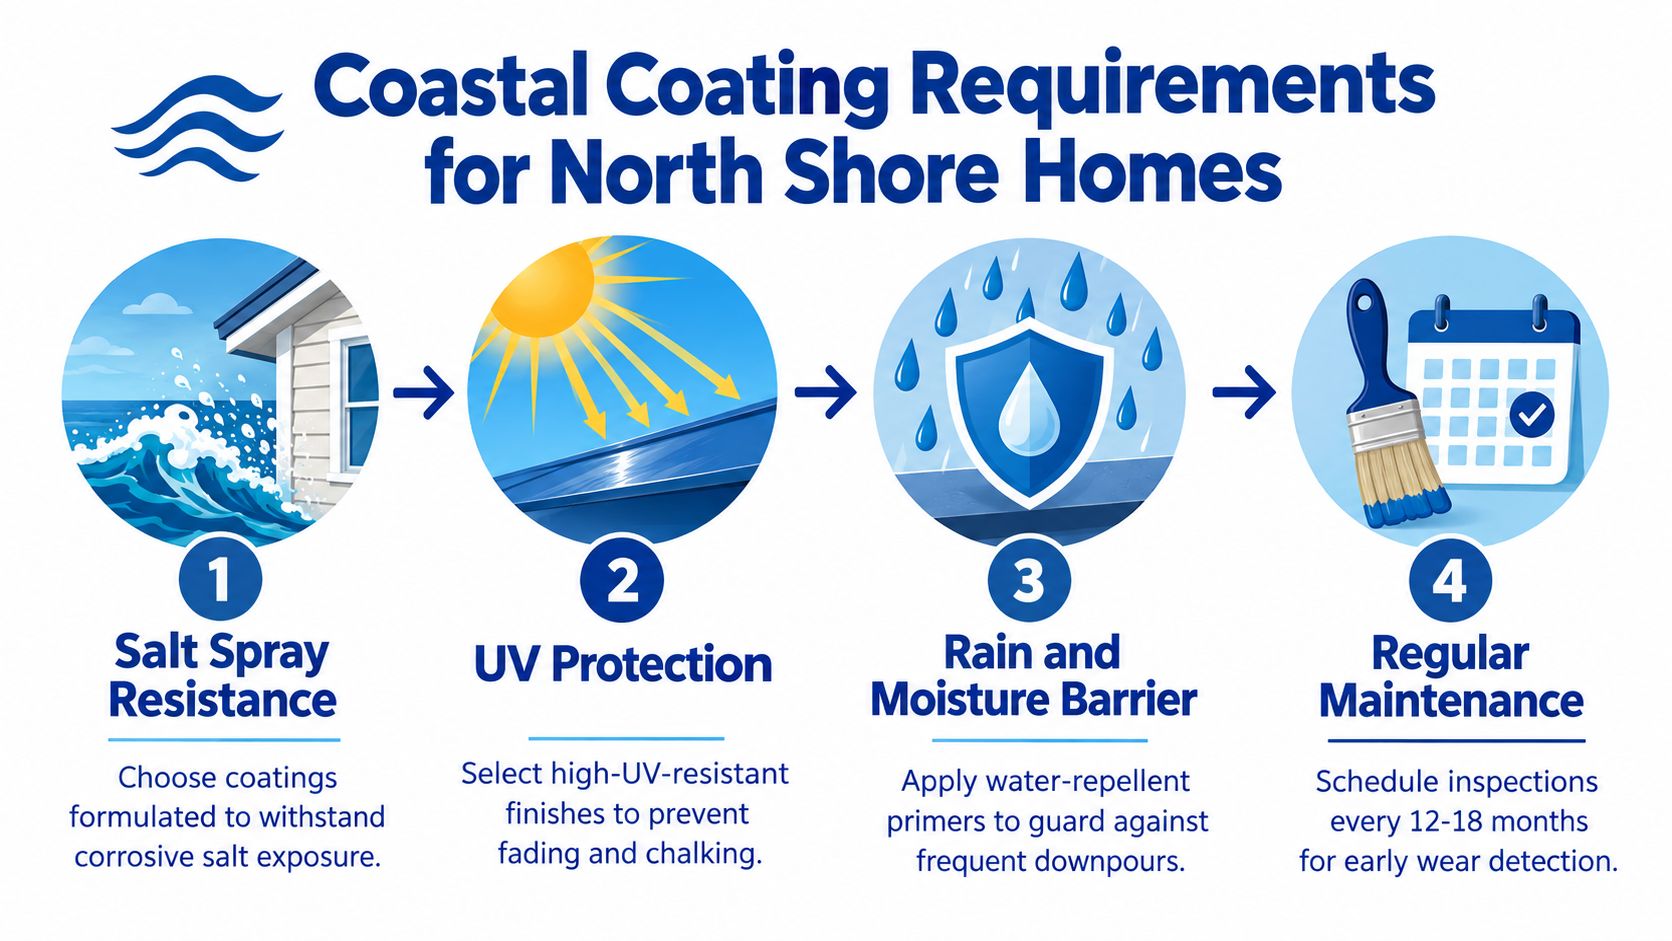
Coastal exposure changes what a durable repaint demands. Salt can accumulate on cladding, rain can wet vulnerable junctions and strong sun can wear exposed finishes. The painter's job is to match preparation and coatings to the actual surface and conditions, not to apply a standard system everywhere.
Stats NZ reports that, between 2004 and 2023, Leigh in the wider Auckland region recorded an average of 137 days per year when peak UV intensity reached very high or extreme levels, the highest figure among monitored locations (Stats NZ climate indicators). Leigh is a regional indicator, not a measurement for every North Shore street, but it helps explain why UV durability deserves attention. Repeated exposure can contribute to fading, chalking, loss of gloss and deterioration of exposed timber and sealants.
Start with the substrate, not the tin
A practical workflow is to inspect the cladding and joints, wash gently, allow the surface to dry, check moisture, then remove unsound paint and repair defects. Exposed or repaired areas need compatible priming before the specified topcoat goes on. Where the cladding manufacturer requires it, coating should cover exposed edges as well as the main face.
Avoid assuming that high-pressure cleaning is a shortcut. Water blasting can damage a coating or substrate; low-pressure water and a brush are gentler options. If deterioration keeps returning, have the painter investigate the cause instead of applying another coat.
Colour also affects performance. Genia's installation guide sets a light reflectance value limit for dark finishes on its weatherboards because higher solar absorption can contribute to movement, distortion or resin bleed. Check the specific cladding manufacturer's requirements before settling on a dark colour, and ask your painter to explain any compatibility concerns.
For a closer look at product and preparation choices, see this guide to exterior paint for coastal homes. Manufacturers also recommend regular washing to remove salt. For general cladding maintenance, guidance suggests washing every 6–12 months, and every 3–4 months in extreme coastal or sea-spray exposure; follow the material and coating manufacturer's instructions for your property.
Timing and Staging Your Exterior Repaint
A good booking date is one that gives the crew a workable weather window and the surfaces time to dry. Spring and early autumn can be practical periods for North Shore projects, but conditions on the day matter more than the season's name. Rain, high humidity, dew or damp cladding can delay preparation and coating.

Plan around drying, not just crew availability
Ask how the contractor will decide whether the surface is ready. A moisture meter provides a more reliable check than touch alone, particularly where timber has been washed or where deterioration has recurred. New Zealand guidance says timber weatherboards should have moisture content of 20% or less when painted, and exterior timber stains generally need reapplication every three to five years (New Zealand painting and decorating guidance).
The exact working and recoat conditions depend on the product. Ask the painter to follow the coating manufacturer's temperature, moisture and recoat instructions, and to explain how rain could affect the programme. Rushing a coat onto a surface that hasn't dried properly can undermine adhesion and durability.
For more on deciding when a repaint is due, consult this guide to when to repaint a house. Don't treat a general interval as a guarantee for every wall. Exposure, substrate, previous preparation and maintenance all influence how a particular surface holds up.
Make access straightforward
Before work starts, move outdoor furniture away from walls and trim plants that block access. Agree how the crew will protect paths, gardens and outdoor fixtures, and confirm where ladders or scaffolding can be placed. If you manage a commercial property, ask whether the work can be staged or scheduled to reduce disruption and maintain safe access.
Get the expected sequence in writing, including preparation, repairs, priming, coating and cleanup. A delay caused by wet weather may be frustrating, but a painter who stops rather than coating a damp surface is protecting the quality of the work. Agree how schedule changes will be communicated before the job begins.
What a Detailed Quote Should Include
Two exterior painting quotes are only comparable if they describe substantially the same work. A low figure can reflect a smaller scope: perhaps it includes finish coats but leaves washing, timber repairs, extra priming or removal of loose paint out of the price. The written detail tells you what you're buying.
Compare the scope, not just the total
A useful quote identifies the surfaces and elevations included, the preparation planned and how defects will be handled. It should name the proposed coating system, including primer and topcoat, and state the number of coats specified for each area. It should also explain how additional repairs or unexpected problems will be priced and approved.
| What to Look For | Strong Quote | Weak Quote |
|---|---|---|
| Surface scope | Lists the cladding, trims and other areas included | Says only “exterior repaint” |
| Preparation | Describes washing, scraping or sanding, repairs and priming | Uses a general phrase such as “prepare surfaces” |
| Moisture and defects | States how damp or damaged areas will be assessed and what happens if found | Doesn't mention moisture or underlying defects |
| Coating system | Names products or system type and specifies coats by surface | Promises “quality paint” without details |
| Exclusions and extras | Identifies exclusions and explains how additional work is approved | Leaves extra preparation open-ended |
| Completion | Includes masking, site protection, cleanup and handover details | Gives no clear account of cleanup or follow-up |
A precise quote doesn't mean every hidden defect can be priced before work begins. It means you know how the contractor will handle that uncertainty. Ask for a process: stop, show you the issue, explain the repair and agree the additional cost before proceeding.
For a practical reference on the information to gather, review this guide to a painting house quotation. Then compare each proposal line by line. If one contractor has allowed for repairs and another hasn't, the lowest total may not represent the lowest cost for completing the same job.
Ask for clarity in writing: What's included, what's excluded, and who approves extra work before it starts?
Moisture Diagnosis Before Colour Selection
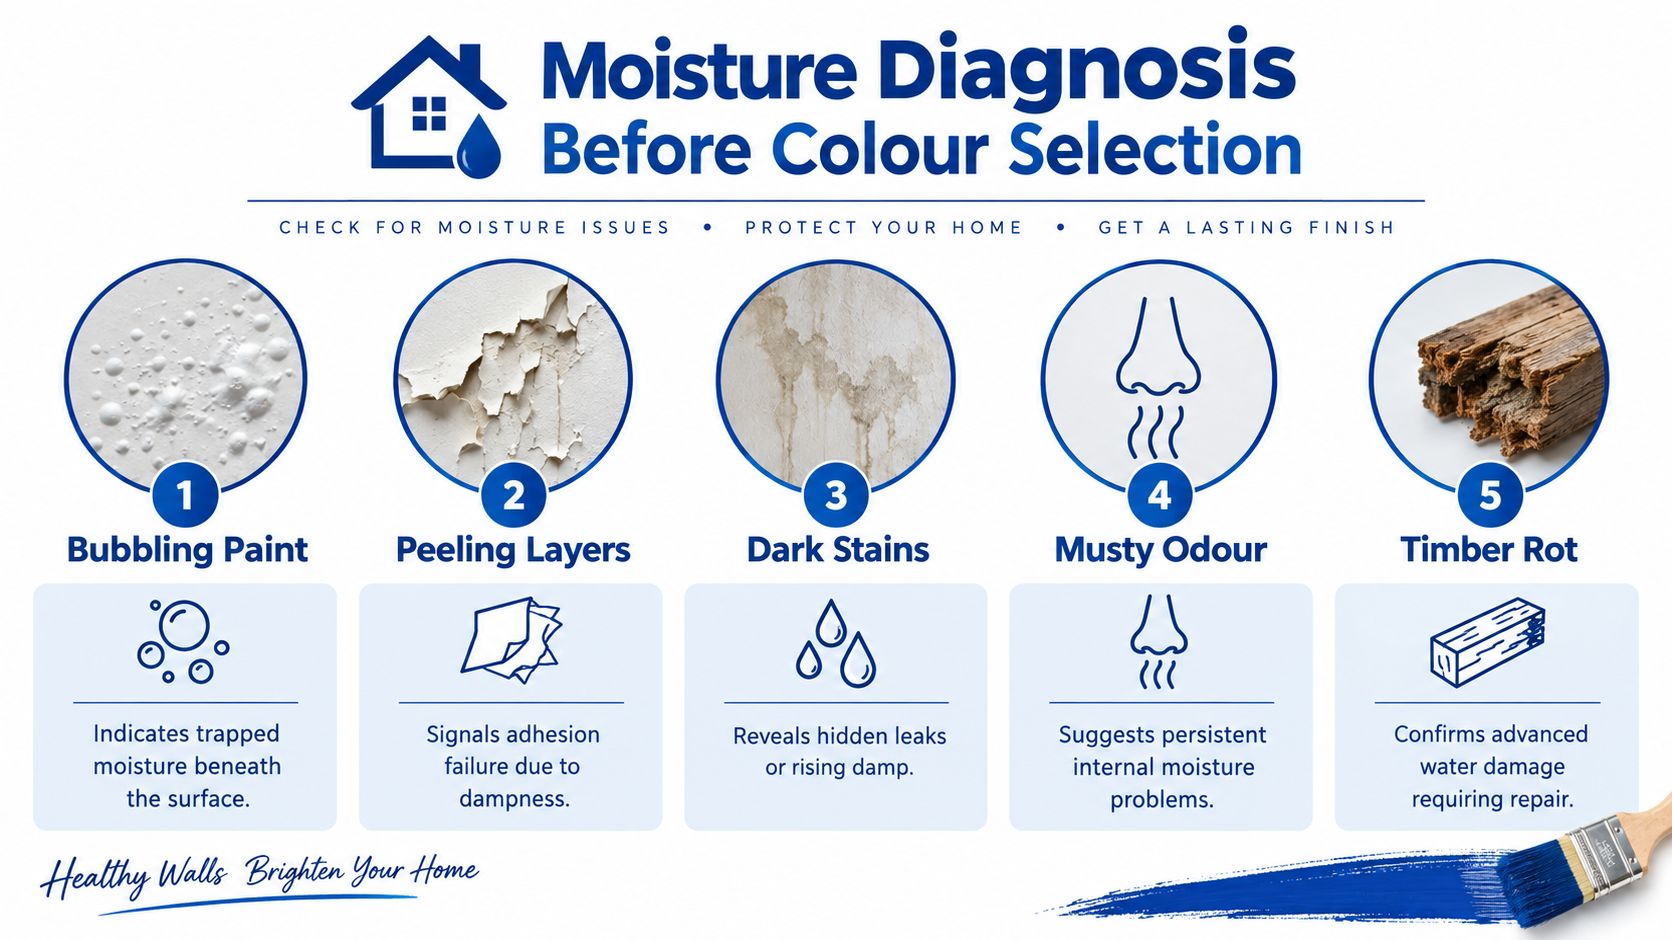
Choose the colour after you know the surface is ready. Bubbling paint, recurring peeling, dark stains and cracking can point to more than an ageing finish. Water may be entering at a gutter, flashing, window junction, penetration or failed sealant, or the wall may not be drying as it should.
New Zealand Building Code guidance treats external moisture as a system involving water entry, absorption, accumulation and drying, rather than a paint defect (Building Code moisture guidance). That distinction matters because a new coating can hide visible symptoms for a time without fixing the route water takes into the building.
Follow a pre-paint decision path
- Look for patterns: Note bubbling, staining, cracking, mould, soft timber or paint that repeatedly fails in the same place. Mark where each symptom appears and whether it follows a joint, window, roof edge or sheltered corner.
- Check likely water-entry points: Inspect gutters, flashings, window junctions, penetrations and sealants. A painter can identify visible concerns, but shouldn't claim to diagnose every concealed building-envelope defect from the ground.
- Measure and investigate: Ask whether the painter will check substrate moisture, especially in suspect timber or previously failed areas. If moisture is high or its source isn't clear, pause coating work until the cause is understood.
- Choose the right next step: Localised coating damage may need ordinary preparation and repair. Failed joinery or cladding may need a repair specialist. Persistent leaks, widespread dampness or uncertain moisture pathways may warrant an independent weathertightness assessment.
Know when painting should stop
A responsible contractor should explain when the job needs further investigation before painting continues. That can feel like an inconvenient pause, but it's better than paying for a uniform finish over a problem that remains unresolved. Ask the painter to document the affected area, the moisture readings where taken, the recommended action and any repairs completed.
The best acceptance check isn't colour alone. Look for a dry substrate, sound adhesion, repaired defects, sealed water-entry points and clear records of what the crew found and addressed. If the contractor can't explain why a visibly damp or repeatedly failing surface is ready to coat, don't ask the colour chart to settle the question.
Final Checklist Before You Sign
Before you commit, make sure the proposal explains both the finish and the condition of the surface it will cover. A dependable result relies on decisions made before the first coat: what the painter found, how they'll prepare it and what they'll do if hidden damage appears.
Confirm the scope and safeguards
Use this checklist during your final review:
- Contractor details: Confirm insurance and relevant credentials, and ask for references from comparable exterior projects.
- Moisture plan: Check how the painter will identify damp or damaged areas and when they'll pause for a repair or specialist assessment.
- Preparation: Look for specific washing, drying, scraping or sanding, repairs and priming tasks, not just a broad promise to prepare the surface.
- Coating system: Confirm the products, primer and topcoats, the areas covered and the number of coats specified.
- Colour suitability: Check that the selected finish is compatible with the cladding manufacturer's requirements and the property's exposure.
- Price and changes: Make sure exclusions are clear and that extra work needs your approval before it proceeds.
- Timing and guarantee: Agree the expected sequence, how weather delays will be handled and the terms of any written workmanship guarantee.
- Handover: Ask for a final walkthrough, cleanup confirmation and a record of repairs or areas that need follow-up.
Inspect the finished work
Walk around the property with the painter when the work is complete. Check that the agreed surfaces have been coated, edges and repaired areas have been addressed, and the site has been cleaned up. If something doesn't match the written scope, raise it before the job is signed off.
A strong repaint should look even, but appearance is only part of the result. You're hiring for a coating system that suits the substrate, careful preparation and an honest account of any moisture issues. When you compare local exterior painters on those points, you're more likely to get a finish that protects the building rather than disguising its condition.
Painters North Shore provides residential and commercial exterior painting across Auckland's North Shore, with preparation and coatings selected for surfaces such as weatherboard, plaster, brick and cedar. If you're planning a repaint, Painters North Shore can assess the property and provide an itemised estimate.